5 Best Induction Cooktops for RVs (October 2026)
The best induction cooktops for RVs include the Duxtop 9600LS Portable Induction Cooktop for everyday RV meals, the ChangBERT 8-Inch Commercial Induction Cooktop for longer cooking sessions, and the Nuwave Flex Precision Induction Cooktop for shallow counters.
On this page (9 sections)
- How we chose induction cooktops for RVs
- Which induction cooktop fits your RV kitchen?
- What power setup does an induction cooktop for RV use need?
- How much counter and storage space should you allow?
- What cookware works with an RV induction burner?
- How should you set up and cook on an RV induction burner?
- How do you clean and protect an RV induction cooktop?
- Which mistakes make RV induction cooking harder?
- Which RV induction cooktop should you choose?
The best induction cooktop for most RV kitchens is the Duxtop 9600LS Portable Induction Cooktop because its heat settings, cooking shortcuts and control lock suit everyday meals. Choose a different model when counter depth, push buttons or selectable wattage matters more.
An induction cooktop for RV use must fit your electrical supply and your cooking space. Start with those limits, then choose the controls and cookware that match how you eat on the road.
For a broader selection, see our best portable induction cooktops. Our guides to induction burner wattage and plugging an induction burner into an outlet explain the power checks behind this choice.
Our picks at a glance
-
1
 Best for everyday RV meals
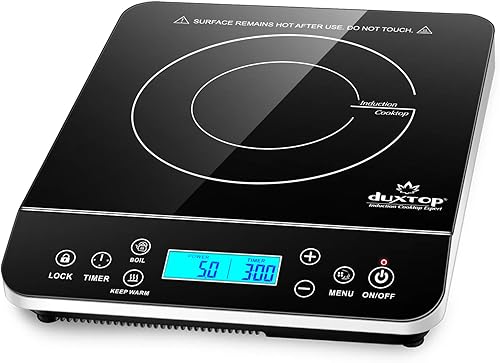
Duxtop 9600LS Portable Induction Cooktop
9.1/10 our score
See it on Amazon -
2
 Best for longer cooking sessions
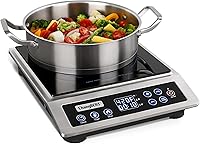
ChangBERT 8-Inch Commercial Induction Cooktop
8.9/10 our score
See it on Amazon -
3

- 4
 Check it
Duxtop 9100MC Portable Induction Cooktop
Best for button control fans - 5
 Check it
Nuwave Precision 10.25-Inch Induction Cooktop
Best for planned power use
How we chose induction cooktops for RVs
We prioritized usable heat controls, counter fit and electrical requirements because those features shape daily RV cooking. We compared dimensions, power options, temperature settings and timers, with extra attention to storage and pan fit.
A compact burner earns its space when you can cook on it without crowding a sink, blocking an aisle or moving half the kitchen. A larger model needs a clear reason to take that space, such as preferred controls or a coil that better matches your cookware.
The order favors the Duxtop 9600LS for general use, followed by more specific alternatives. A lower-ranked model can still be the better choice for your particular counter or power plan.
| Product | Best for | Power range | Dimensions | Power connection | Our score |
|---|---|---|---|---|---|
| Duxtop 9600LS Portable Induction Cooktop | everyday RV meals | 100–1800 W | 14 W x 11.4 D x 2.5 H in | 110/120 V, 15 amp outlet | 9.1 |
| ChangBERT 8-Inch Commercial Induction Cooktop | longer cooking sessions | 200–1800 W | 12.2 W x 15 D x 2.8 H in | 120 V | 8.9 |
| Nuwave Flex Precision Induction Cooktop | shallow counters | 12 W x 10 D x 2 H in | 8.1 | ||
| Duxtop 9100MC Portable Induction Cooktop | button control fans | 100–1800 W | 16.3 W x 12.7 D x 3.8 H in | 120 V, 15 amp outlet | 8.0 |
| Nuwave Precision 10.25-Inch Induction Cooktop | planned power use | 10.3 W x 11.8 D x 2.3 H in | 7.2 |
Which induction cooktop fits your RV kitchen?
Choose the 9600LS for varied daily meals, ChangBERT for longer sessions, or Nuwave Flex for a shallow counter. The 9100MC favors push-button users, while the Nuwave Precision offers explicit wattage choices for planning electrical loads.
1. Duxtop 9600LS Portable Induction Cooktop for RV cooking
Duxtop 9600LS Portable Induction Cooktop
- 20 power levels from 100 to 1800 W
- 20 temperature settings from 100°F to 460°F
- Timer up to 10 hours
- Fast boil, keep warm and child lock
A flexible choice for RV cooks who switch between boiling, simmering and keeping food warm. Its touch controls include a lock to prevent accidental setting changes.
Pros
- Separate power and temperature modes
- Keep-warm and fast-boil buttons
- Long countdown timer
Cons
- Full power needs careful load planning
- Magnetic pan base must measure at least 5 in
The 9600LS is the strongest all-around choice if your RV cooking includes breakfast, a quick lunch and a cooked evening meal. Its 20 power levels from 100 to 1800 W give you several ways to move from heating a pot to maintaining a gentler simmer.
Fast boil and keep warm reduce the need to set everything from scratch. The child lock helps prevent accidental changes after you have set the controls, though it does not replace supervision around hot cookware.
Its timer extends to 10 hours, which gives you room for longer recipes without repeatedly resetting it. Stay nearby during cooking; a long timer is a convenience, not permission to leave an active burner alone.
Choose it if touch controls suit you and you want one burner for several cooking tasks. Skip it if you strongly prefer physical buttons or cannot provide a suitable electrical connection.
The required 110/120 V, 15 amp outlet must be part of a circuit with enough available capacity. Read how many amps an induction burner needs before treating an open outlet as spare cooking capacity.
2. ChangBERT 8-Inch Commercial Induction Cooktop
ChangBERT 8-Inch Commercial Induction Cooktop
- 9 power levels from 200 to 1800 W
- 18 temperature settings from 120°F to 460°F
- Timer up to 10 hours
- 8 in heating coil
Continuous-duty circuitry and a stainless steel housing suit frequent meal preparation. Choose it when you have room for its deeper body and prefer tactile buttons.
Pros
- Continuous-duty circuitry
- Tactile push-button controls
- Stainless steel housing
Cons
- Deepest body in this group
- Fewer power steps than either Duxtop
Choose the ChangBERT if cooking is a regular part of your RV routine and you have a permanent place to set the burner. Its 8 in heating coil deserves attention when matching a skillet or pot to the heated area.
The continuous-duty circuitry is the main reason to consider it for longer cooking sessions. That design does not remove the need for clear vents, a suitable circuit or supervision.
The stainless steel housing and tactile push buttons suit cooks who prefer a metal body and a clear button press. ChangBERT also includes hot-surface indication, a useful reminder in a small kitchen where someone may reach across the counter.
Its main compromise is depth: the body extends 15 in from front to back before allowing for required clearance. A counter that looks wide enough can still leave too little room behind it.
Buy it for frequent meal preparation when the deeper shape fits. Skip it for a shallow galley or occasional reheating, where its larger body is harder to justify.
For more context on burner types and kitchen fit, read our portable induction cooktop guide.
3. Nuwave Flex Precision Induction Cooktop
Nuwave Flex Precision Induction Cooktop
- Temperature range from 100°F to 500°F
- Adjust temperature and cooking time while cooking
- 12 W x 10 D x 2 H in
- Shatter-resistant ceramic glass
The shallow body suits small counters and low storage spaces. Confirm the exact unit’s wattage with Nuwave before matching it to an RV circuit or inverter.
Pros
- Shallow body
- Heat and time adjustments without restarting
- Low storage height
Cons
- Electrical requirements need confirmation
- Small coil calls for careful pan matching
The Nuwave Flex is worth considering when your counter is shallow or your storage shelf has little height. Its 10 in depth and 2 in height make its shape the strongest reason to choose it.
You can adjust heat and cooking time without restarting the controls. That helps when a sauce thickens sooner than expected or a meal needs a few more minutes.
Its 6.5 in coil makes pan selection especially relevant. A broad skillet can fit on a glass surface while extending well beyond the main heating area, so judge the pan base rather than its rim.
Before buying, confirm the exact unit’s wattage with Nuwave because the available power figures conflict. Resolve that once before planning a circuit or battery setup around this model.
Choose the Flex when its shape solves a real space problem and the electrical requirements fit your RV. Skip it if you need a clearly established power plan immediately or mainly cook in wide pans.
Our guide to choosing a portable induction cooktop explains how footprint and cookware fit work together.
4. Duxtop 9100MC Portable Induction Cooktop
Duxtop 9100MC Portable Induction Cooktop
- 20 power levels from 100 to 1800 W
- 20 temperature settings from 100°F to 460°F
- Push-button controls and large display
- Countdown timer up to 170 minutes
Choose this Duxtop if you prefer push buttons and a large display. It needs more counter and storage space than the 9600LS.
Pros
- Push-button controls
- Broad choice of heat settings
- Auto-pan detection
Cons
- Widest and tallest body here
- Shorter timer than the 9600LS
Choose the 9100MC if push buttons and a large display make cooking easier for you. It offers the same stated power and temperature ranges as the 9600LS, so the main decision is about controls, size and timer needs.
The countdown timer runs up to 170 minutes. That covers many everyday meals, but cooks who want longer timed sessions have more room with the first Duxtop pick.
This is the widest and tallest burner in the group. Allow space to set it down, lift it out of storage and turn a pan handle without reaching into an aisle.
Like the 9600LS, it requires a magnetic pan base at least 5 in across. Auto-pan detection shuts the unit off after 60 seconds without suitable cookware, but it does not tell you whether a large pan matches the heating area well.
Buy it if button controls are worth the extra counter space. Skip it if storage is tight or touch controls are already comfortable for you.
The Duxtop 9600LS review gives a closer look at the more compact alternative.
5. Nuwave Precision 10.25-Inch Induction Cooktop
Nuwave Precision 10.25-Inch Induction Cooktop
- 81 temperature settings from 100°F to 500°F
- 600, 900 and 1400 W settings
- Temperature changes in 5°F steps
- Adjust cooking time without restarting
Three selectable wattage settings help you plan cooking around available power. Small temperature steps also suit cooks who make frequent heat adjustments.
Pros
- Selectable wattage settings
- Temperature adjusts in 5°F steps
- Lower maximum draw than the 1800 W picks
Cons
- Only three wattage choices
- Supply voltage needs confirmation before RV use
Choose this Nuwave when selectable wattage is central to your cooking plan. Its 600, 900 and 1400 W choices give you clear settings to consider alongside other electrical loads.
The lower settings can help you leave capacity for other equipment, provided the full setup is compatible. They cannot make an overloaded circuit or undersized inverter suitable for cooking.
Temperature adjustment is another reason to consider it. The controls offer 5°F steps and let you change cooking time without restarting, which suits cooks who make small adjustments as food cooks.
Those temperature steps are control choices, not a promise that every part of your pan or food will hold the displayed temperature. Pan construction, food quantity and stirring still matter.
Confirm the required supply voltage before choosing it for an RV. Buy it for deliberate power planning and frequent heat adjustments; skip it if you want more intermediate wattage choices or prioritize maximum heating power.
If your real need is cooking two dishes at once, read our single vs. double induction cooktop guide before choosing any single burner.
What power setup does an induction cooktop for RV use need?
Your power source, circuit and other running appliances must all support the burner. A suitable outlet is only one part of that check.
Start with how you camp most often. Regular shore-power stays, generator use and battery-powered stops create different limits, even in the same RV.
Shore power: check the branch circuit too
Shore power supplies the RV, but the kitchen outlet still belongs to a particular branch circuit. Appliances at different outlets may share that circuit.
Before cooking, identify competing loads such as a microwave, kettle or coffee maker. Turn off an unnecessary appliance rather than assuming the available sockets each provide separate capacity.
The RV’s overall supply limit matters too. Air conditioning or electric water heating can reduce the capacity available for cooking even when they use separate circuits.
Inverters and generators: plan for sustained cooking
Use an inverter’s continuous output, not its brief peak figure, when comparing it with a cooktop. Include other loads and follow the inverter instructions for appliance compatibility.
Battery capacity sets a separate limit on cooking time. An inverter may support the burner while the battery bank still has too little usable energy for your planned meals.
For generators, compare the usable continuous capacity with everything running at once. A burner that fits the generator’s capacity by itself may leave little room for another appliance.
Do not assume a gentle temperature setting always means an equally gentle electrical draw. Some induction burners regulate low heat by cycling power, so temperature mode alone is not a dependable wattage limit.
How much counter and storage space should you allow?
Allow room for the burner, pan, required clearance and your hands. Matching the appliance’s outside dimensions to a bare patch of counter is not enough.
Mark the burner’s footprint on the counter with paper, then place your intended pan over that area while everything is cold. Check the handle, lid and space needed to stir or lift the pot.
A low cabinet, nearby curtain or crowded sink edge can rule out an otherwise suitable location. Follow the model’s clearance instructions instead of guessing a universal gap.
Keep the burner on a firm, level, heat-safe surface with its vents clear. Do not balance it on a loose sink cover or put it on a cushioned surface that could block airflow.
For storage, measure the opening as well as the inside of the cupboard. A burner may fit on a shelf but be awkward to angle through its door.
Plan a place for the cooled unit where it cannot slide, fall or strike cookware during travel. Pack the cord without tight bends and keep heavy items from resting on the glass.
What cookware works with an RV induction burner?
Use induction-compatible cookware with a magnetic, flat base that meets the burner’s size guidance. A magnet that grips the bottom is a useful first check.
Cast iron, enameled iron and some stainless steel can work. Plain aluminum, copper and nonmagnetic stainless steel need a compatible magnetic base to work with induction.
Measure the flat base that touches the cooktop, not the pan’s upper rim. A small saucepan may have a wide opening but a base too small for the burner to detect.
Both Duxtop models here require a base at least 5 in across. Check each model’s cookware instructions before relying on a tiny coffee pot or narrow camping pan.
A large glass surface does not mean the whole pan bottom receives direct induction heat. A pan that greatly exceeds the coil’s size relies more on its construction to spread heat toward the edges.
Our guide to induction burner size versus pan size helps you match the heated area to your cookware.
For a small RV kitchen, start with a saucepan and a skillet that cover your usual meals. Add a larger pot only if your recipes, burner and storage space justify carrying it.
How should you set up and cook on an RV induction burner?
Set up the burner while parked, with compatible cookware ready and the cooking area clear. Make the first meal simple so you can learn the controls without managing several dishes.
Before switching it on
Check that the glass is intact, the cord is undamaged and the vents are clear. Dry the pan base and cooktop before placing the pan in the center.
Connect the unit as its manual directs. Avoid power strips, outlet splitters and improvised extension arrangements; if the cord will not reach, choose a suitable location rather than stretching it across a walkway.
Turn handles away from the counter edge and leave room to remove a hot lid. Keep a dry heat-safe landing spot ready for the pan.
Use power mode and temperature mode with a purpose
Use power mode when you want to raise or lower heat input, such as bringing water to a boil and then reducing it. Temperature mode gives you another way to manage tasks such as warming or pan cooking.
Start with moderate heat for unfamiliar pans and recipes. Induction can heat cookware quickly, so avoid leaving an empty pan heating while you chop ingredients.
For sauces and other thick foods, stir and watch the food rather than relying only on the display. Reduce heat before the pan becomes excessively hot, especially when using cookware that holds heat well.
Our how to use a portable induction cooktop guide walks through these controls in more detail.
Plan meals around one cooking zone
Choose meals that finish in one pot, or cook components in an order that allows them to wait safely. Prepare ingredients before switching on the burner so active cooking takes less counter juggling.
For a meal with several parts, decide which dish needs the pan last. A quick final sauce or freshly cooked eggs usually benefit more from that spot than a component that can rest covered briefly.
How do you clean and protect an RV induction cooktop?
Let the burner cool before cleaning or packing, then clean it according to its manual. Heat from the pan can leave the glass hot after the controls are off.
Remove the pan and allow the cooling process to finish as directed before disconnecting power. Use a soft cloth and a suitable cleaner, keeping liquid away from openings and controls.
Lift cookware instead of dragging it across the glass. Wipe grit from pan bottoms and the cooking surface, since trapped particles can scratch the surface when a pan moves.
Do not immerse the burner or spray cleaner into its vents. Keep air openings free of dust and nearby towels so the cooling system can work.
A protective mat is not an automatic addition to every setup. Check the cooktop instructions before placing anything between the glass and pan; our induction cooktop mat guide explains the decision.
Pack the unit only when it is cool and dry. Shatter-resistant glass still needs protection from impacts and pressure during travel.
Which mistakes make RV induction cooking harder?
The most costly mistake is buying before checking power and pan fit. Most other problems come from treating the burner like a spare surface rather than a cooking appliance that needs room and airflow.
- Counting outlets instead of circuits. Two sockets can share the same electrical limit, so map the circuit before combining high-draw appliances.
- Choosing by maximum wattage alone. The heat adjustments you use for simmering may matter more than the highest setting.
- Confusing glass size with coil size. An oversized pan can leave food near the edge cooking differently from food in the center.
- Packing only a favorite camping pot. Confirm compatibility and base size before leaving home.
- Blocking vents to save space. Towels, soft mats and nearby bags can interfere with airflow.
- Using a timer as supervision. Stay nearby, particularly with oil, thick sauces or foods that can boil dry.
- Packing the burner immediately after dinner. Leave cooling and cleaning time before securing it for travel.
If a pan does not heat, check its compatibility, size and position before repeatedly increasing the setting. Follow the manual’s fault guidance if the problem continues.
Some cookware can make a high-pitched sound during induction cooking. Our guide to induction cooktop noise explains common causes and when to stop and check the appliance.
Which RV induction cooktop should you choose?
Choose your induction cooktop for RV use by the constraint you cannot change: electrical capacity, counter shape or cookware. Then pick the controls that suit your meals.
The Duxtop 9600LS is the default choice for varied daily cooking. Choose ChangBERT when longer sessions and its coil size justify the deeper body.
Pick the Nuwave Flex when shallow counter space is the deciding factor, after resolving its electrical requirements. Choose the Duxtop 9100MC if physical buttons make it easier for you to cook and you have room for it.
The Nuwave Precision 10.25-Inch makes sense when selectable wattage is central to your plan. Its smaller temperature steps are a useful extra for cooks who adjust heat often.
Before ordering, write down your available cooking space, usable electrical capacity and pan-base sizes. Use that short checklist to compare any alternatives in our portable burner recommendations.
Our top 3 picks at a glance
-
1
Best for everyday RV meals
Duxtop 9600LS Portable Induction Cooktop
9.1/10 our score
See it on Amazon -
2
Best for longer cooking sessions
ChangBERT 8-Inch Commercial Induction Cooktop
8.9/10 our score
See it on Amazon -
3
Frequently asked questions
Can you use an induction cooktop in an RV?
Yes, if your RV’s electrical supply and circuit support the cooktop’s requirements. Include other appliances sharing that supply when planning the load, and follow the RV and burner manuals.
Use the cooktop while parked on a stable, heat-safe surface with the required clearance and compatible cookware.
What wattage induction cooktop works in an RV?
The right wattage depends on your available circuit capacity, other running appliances and power source. A lower setting can leave more room for other loads, but it does not prove compatibility.
Check the burner’s electrical requirements against your RV, generator or inverter instructions before choosing a model.
Do RV induction cooktops need special pans?
They need induction-compatible cookware with a magnetic base and a suitable base diameter. A magnet that grips the bottom is a useful first check, followed by the cookware and burner instructions.
Cast iron and some stainless steel work; plain aluminum and copper need a compatible magnetic base.
Can an induction cooktop run from an RV inverter?
Yes, when the inverter is compatible and has enough continuous capacity, and the battery system can supply the load. Account for conversion losses and other equipment using the inverter.
Peak output is not continuous capacity, and inverter size alone does not tell you how long the batteries will last.
Is a portable induction cooktop safe to use in an RV?
Use it while parked on a level, stable surface, following the cooktop and RV instructions. Keep ventilation openings clear, stay nearby while cooking and turn pan handles away from walkways.
The pan and glass can remain hot after cooking, so allow cooling before cleaning, packing or moving the unit.