Best 24-Inch Induction Cooktops (October 2026)
The Empava Ease 24-Inch Built-In Induction Cooktop suits buyers who want several pans cooking in a compact kitchen. Choose this 24 inch induction cooktop if your cookware fits its layout and your kitchen supports its hardwired installation.
On this page (12 sections)
- Why the Empava suits a compact kitchen
- 24-inch induction cooktop dimensions at a glance
- Empava Ease 24-Inch Built-In Induction Cooktop
- What should you check before choosing a 24-inch induction cooktop?
- How can you tell whether your pans fit the cooking layout?
- Which cookware should you keep for induction?
- Is a 24-inch cooktop better than a 30-inch model?
- How should you set up and start using the cooktop?
- What do the safety features help with?
- How do you keep the glass surface easy to clean?
- Which buying mistakes are easiest to avoid?
- Should you choose the Empava Ease 24-inch induction cooktop?
The Empava Ease is a good 24 inch induction cooktop for compact kitchens where dinner involves several pans. Choose it if your everyday cookware fits its layout and your kitchen can support a permanent, hardwired installation.
Its appeal is having separate places for a main dish, vegetables and sauce without giving up as much counter width as a larger cooktop. The key buying question is whether those pans fit together comfortably.
This guide covers one model, so the recommendation rests on its fit for your kitchen. For other built-in choices, see our best built-in induction cooktops, or compare 30-inch induction cooktops if your counter allows a wider surface.
Our picks at a glance
-
1
 Best for compact family kitchens
Empava Ease 24-Inch Built-In Induction Cooktop
7.3/10 our score
See it on Amazon
Why the Empava suits a compact kitchen
The Empava suits cooks who want several cooking zones in a permanent, compact installation. Its layout makes the most sense for meals built around a medium skillet, a saucepan and smaller side dishes.
We compared its dimensions, controls, cookware requirements and installation style with the needs of a small built-in kitchen. Those details support the recommendation, but your pan sizes and cabinet measurements decide the final fit.
A compact cooktop is especially useful when preserving nearby prep space matters. Leaving room to chop vegetables or set down a serving bowl can be more useful than adding cooking width you rarely need.
Skip this size if you routinely use wide pans together. A crowded surface makes it harder to reach handles, stir food and move a hot pan without brushing another pot.
For the wider category, our induction cooktop buyer's guide explains the differences between portable units and built-in models.
24-inch induction cooktop dimensions at a glance
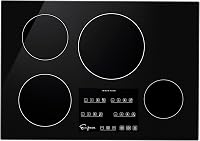
The Empava measures 23.23 in wide, 20.47 in deep and 2.16 in high overall. These are appliance dimensions, so use the installation instructions to find the required countertop opening and clearances.
| Product | Best for | Width | Cooking zones | Installation | Our score |
|---|---|---|---|---|---|
| Empava Ease 24-Inch Built-In Induction Cooktop | compact family kitchens | 23.23 in | 4 | Drop-in, hardwired model | 7.3 |
The nominal size tells you which general kitchen layout to consider. It does not establish whether this appliance will replace your current cooktop without changes to the counter.
For a replacement, record both the existing opening and the space around it. For a new kitchen, give the installer the exact model instructions before the countertop is cut.
Empava Ease 24-Inch Built-In Induction Cooktop
The Empava is best suited to small kitchens that still need several pans available. Its main tradeoff is the limited room around larger cookware, which deserves a closer look before you commit.
Empava Ease 24-Inch Built-In Induction Cooktop
- Four induction cooking zones
- 9 heat levels
- Digital touch controls
- Pan sensor
- Child control lock
A compact built-in choice for cooks who want separate pans for a main dish, sides and sauce. Choose it after checking pan spacing, the required counter opening and the electrical connection.
Pros
- Four zones support meals with several components
- Hot surface indicator and child control lock
- Smooth glass ceramic surface wipes clean without burner grates
Cons
- Hardwired connection needs installation planning
- Compact surface needs careful checking with wide cookware
Its 9 heat levels provide steps from gentle heating to rapid boiling, with digital touch controls for changes. That suits cooks comfortable choosing a numbered level and adjusting it as the food responds.
The pan sensor detects cookware and shuts the element off when no pan is present. An “H” indicator warns that a cooking area is hot, while the child control lock helps prevent unintended activation.
The smooth glass ceramic surface removes the need to clean around burner grates. Follow the care instructions, since cookware can still transfer heat to the glass and spills still need attention.
Choose it for weeknight meals with a main dish and a few sides. Skip it if you need a movable appliance or regularly use several oversized pans together.
Before ordering, use our guide to choosing a built-in induction cooktop to work through the cabinet and electrical checks.
What should you check before choosing a 24-inch induction cooktop?
Check physical fit, pan spacing and electrical requirements before comparing convenience features. A timer or control lock cannot make an unsuitable counter opening or crowded cooking surface work.
Start with the things that would force a different appliance choice. Once those pass, decide whether the controls and cooking layout match your habits.
Will the 24-inch induction cooktop fit your counter?
Compare the required cutout with the opening in your countertop. Measure the opening itself rather than the visible glass on the old appliance, which may overlap it on every side.
Check the shape of the corners, the countertop thickness and the material around the opening. A qualified installer should assess any changes, particularly where cutting could weaken a narrow strip of counter.
Also measure the cabinet below. Drawers, rails, wiring and the cooktop body all need room, and a shallow-looking appliance can still require space beneath it for cooling.
For a replacement, do not remove the old unit or enlarge the opening until the new model's requirements are confirmed. That keeps a fit problem from becoming an unusable kitchen.
Does the space below meet the installation requirements?
Leave the ventilation and clearance space required by the cooktop manual. Storage directly below the appliance must not block its cooling path or press against wiring.
Think about what normally goes in that cabinet. Tall utensils, packed drawers and stacked trays can interfere with the space an installer needs to leave clear.
An oven below adds another set of requirements. Empava identifies compatibility with its own 24- or 30-inch under-counter single wall ovens; other combinations need confirmation against both appliances' instructions.
Do not assume that two appliances fit together because their widths match. The space between them and the route for their electrical connections matter too.
Can your electrical setup support the installation?
Have an electrician match the exact electrical requirements to your home's wiring before installation. This Empava is hardwired, so planning the connection is part of the buying decision.
Give the electrician the model instructions rather than asking for a circuit based only on cooktop width. A previous electric appliance's connection does not prove that the new one has the same needs.
Access matters as well. The connection should remain reachable as required after the cooktop and any appliance below it are installed.
For background on power terms, read our guide to induction cooktop wattage. Use the cooktop manual and your electrician's assessment for the actual installation.
How can you tell whether your pans fit the cooking layout?
Check your usual combination of pans together, including their rims and handles. The number of zones tells you how many positions exist, but pan size determines how comfortably you can use them.
Choose a real meal as your reference. A skillet, a rice pot and a small saucepan give a more useful picture than imagining every zone occupied by identical small pots.
Measure the base and the rim separately
Measure the flat bottom that sits on the glass, then the widest part of the pan. The base matters for zone compatibility, while the rim determines whether neighboring cookware will crowd it.
A flared skillet can take up much more space than its base suggests. Two pans may suit their individual zones yet still touch at the rims.
Check the permitted cookware sizes in the cooktop instructions. Our guide to induction burner size and pan size explains why matching the base to the cooking area matters.
Leave room for handles and control access
Look at where handles point when the pans are centered. You should be able to grip each handle without reaching across another hot vessel.
Keep handles away from the front edge and from neighboring cooking areas. A full pot should also be movable without catching the handle of a second pan.
Touch controls need clear access during cooking. If your largest pan would cover that area or make you reach over steam, choose a different pan arrangement or a wider cooktop.
Plan for the busiest meal you cook often
Use your regular busy dinner as the deciding case, rather than a holiday meal you cook once a year. The right layout should make ordinary cooking comfortable.
If you usually use 2 pans, extra zones can give you flexibility for a sauce or a different pan position. If you regularly need several broad skillets, extra width deserves priority.
Which cookware should you keep for induction?
Keep pans with compatible magnetic bases that sit flat and match the allowed zone sizes. Check your current cookware before buying replacements, since material names alone do not settle compatibility.
Cast iron generally works with induction, and some stainless steel cookware does too. Plain aluminum, copper and glass cookware generally need a compatible magnetic base layer.
Use a magnet as a first check
Hold a magnet against the outside bottom of each pan. A firm attraction is a useful sign, then the cookware instructions can confirm whether the pan is intended for induction.
Check each piece separately. Pans from different ranges, or even different pieces in one kitchen, may have different base construction.
Do not replace an entire collection because one saucepan fails the check. Identify the pans you use most, then fill the specific gaps.
Check flatness and condition
Choose cookware with a stable, flat base. A rocking pan is awkward to stir and handle, even if its material works with induction.
Keep the outside bottom clean and dry before setting it down. Grit, rough deposits and trapped moisture make the cooking area harder to care for.
Lift heavy cookware instead of sliding it across the glass. This is especially useful with cast iron, where weight and a rough base can make dragging a poor habit.
Treat griddles and oversized pans separately
Confirm that a large griddle or unusual pan is allowed before planning meals around it. Do not assume that a pan spanning 2 zones will receive even heat across its whole base.
The Empava's pan sensor does not establish compatibility with every pan shape. Follow the approved sizes and positions in the manual for cookware that extends beyond a normal cooking area.
Is a 24-inch cooktop better than a 30-inch model?
Choose 24 inches when counter space matters and your pans fit comfortably; consider 30 inches when larger cookware needs more separation. The better size depends on the whole work area, including prep and landing space.
A wider appliance can reduce crowding, but it also uses counter space. In a small kitchen, losing the only useful chopping area can make meal preparation harder.
For a remodel, sketch where ingredients, utensils and finished dishes will sit. Leave a practical place beside the cooktop to set down a hot pan safely.
For a replacement, compare the work involved in changing sizes. A wider appliance may require changes to both the countertop and the cabinet below.
Our 30-inch induction cooktop guide helps if you have room for either size. Compare individual zone layouts, since a wider surface is useful only when that space serves your cookware.
If you mainly cook with a single skillet and a saucepan, a smaller arrangement may be enough. See our 2-burner induction cooktop guide before committing to more cooking positions than you need.
How should you set up and start using the cooktop?
Begin with a completed installation check and compatible cookware, then learn the controls with a simple meal. The first cooking session should help you understand heat changes without juggling several dishes.
Keep the use manual accessible. Find the instructions for selecting a zone, changing its level, using the lock and interpreting display symbols before you begin.
Check the installation before cooking
Have the installer confirm that the appliance is secure and that required ventilation openings remain clear. Cabinet contents should not intrude into the space reserved beneath the cooktop.
Remove packaging and follow the manual's instructions for cleaning the surface before use. Check that pan bases are clean as well.
Leave enough time to learn the controls without a full meal underway. Knowing how to reduce heat or turn off a selected zone makes later cooking easier.
Start below your highest familiar heat setting
Use a moderate setting for your first few cooking tasks, then adjust as needed. Induction heats compatible cookware directly, so habits learned on another stove may need changing.
Avoid leaving an empty pan heating while you prepare ingredients elsewhere. Put food, oil or liquid in the pan as directed by the recipe and cookware instructions.
For boiling, stay nearby and reduce the setting once the water reaches the stage you need. Keeping maximum heat after that point can waste energy and encourage boilovers.
Adjust one step at a time for gentle cooking
For sauces, rice and other foods that need gentle heat, watch the food rather than relying on a familiar number. Control scales differ between appliances.
Lower the setting in small steps until the pan behaves as needed. With a heavy pan, stored heat can keep food cooking after you reduce the power.
If food is about to boil over, reduce the heat and move the pan safely if needed. Do not wait for a control change alone to solve a pan that is already too full.
What do the safety features help with?
The Empava's pan detection, hot surface indicator and control lock help manage specific cooking risks. Continue normal kitchen precautions, including supervising cooking and keeping children away from hot pans.
The glass can remain hot from contact with cookware after a zone is off. Use the display warning and allow cooling time rather than checking the surface with your hand.
Pan detection is useful when cookware is removed, but turn the zone off deliberately when you finish. Treat automatic features as support for a clear shutdown routine.
Keep towels, packaging and other stored items off the cooking surface. It is easier to avoid accidental contact or activation when the cooktop remains clear between meals.
A control lock can help with unintended touches. Learn its operation from the manual, and keep it separate in your mind from whether the surface or cookware is cool.
How do you keep the glass surface easy to clean?
Clean cooled glass with products and tools approved in the manual. A regular wipe after cooking prevents residue from building up around pan positions and controls.
Empava describes the glass ceramic surface as resistant to stains and heat discoloration. That makes care simpler, but it does not remove the need to deal with spills.
Use a light routine after ordinary cooking
Once the surface has cooled, remove crumbs and loose grit before wiping. Use the approved cleaner and a soft cloth, then remove residue as directed.
Clean the bottom of the cookware too. A clean cooktop will quickly become marked again if a pan carries dried food or grease onto it.
Avoid abrasive pads or improvised scraping tools. If stuck food needs a scraper, use only the type and method allowed by the instructions.
Handle troublesome spills according to the manual
Know the instructions for sugar spills and melted plastic before an accident happens. These materials can need different treatment from an ordinary splash, including different timing for removal.
Keep suitable cleaning supplies nearby but away from heat. Having the right tool ready is more useful than reaching for a sharp utensil while a spill hardens.
Never pour cold water onto hot glass to cool or clean it. Follow the prescribed method and protect yourself from the hot surface.
Check before using a protective mat
Use a cooking mat only if the cooktop manual permits it. A heat-resistant label on an accessory does not establish that it suits this appliance.
Our guide to induction cooktop mats and protectors explains the questions to check. Keep any accessory clear of controls and cooling paths, and follow the cooktop's instructions first.
Which buying mistakes are easiest to avoid?
Avoid choosing by nominal width or zone count alone. Most preventable mismatches come from overlooking how the appliance fits the kitchen and the pans used every day.
Using the outer dimensions as a cutting template
Use the required cutout dimensions from the installation manual. The outer glass needs support around the opening, so cutting to its full width can create a serious fit problem.
Confirm the exact model before countertop work starts. A similar-looking appliance is not a reliable template.
Assuming four pans will always fit
Check a real cookware combination before deciding that the zone count meets your needs. Large rims and long handles can reduce the practical space.
For meals that depend on several broad pans, allow more separation. For smaller pots, a compact layout can be a better use of the counter.
Buying new pans before checking the old ones
Sort cookware by compatibility and daily use first. You may need one replacement saucepan rather than a full matching set.
Also consider weight when full, handle comfort and base size. A compatible pan still needs to be easy to use on this particular surface.
Leaving installation questions until delivery
Resolve cabinet fit and electrical work before the appliance arrives. Those checks can change your choice of model or the work needed around it.
Keep a written record of the cutout, clearance requirements and installer decisions. That gives everyone working on the kitchen the same measurements.
Should you choose the Empava Ease 24-inch induction cooktop?
Choose the Empava Ease if your regular pans fit together, your counter meets the installation requirements and you want a permanent compact cooking surface. It suits meals with several components when preserving nearby prep space matters.
Choose a wider model if crowded pans would affect dinner most nights. Choose a smaller or portable format if you rarely need several cooking positions or need an appliance you can move.
Before ordering this 24 inch induction cooktop, confirm the exact cutout and electrical requirements with your installer. Set out your usual dinner cookware as a final check on the layout.
Use our built-in induction cooktop guide for the next installation questions. If pan spacing remains the deciding issue, compare the 30-inch options before committing.
Frequently asked questions
Is a 24-inch induction cooktop large enough for everyday cooking?
A 24-inch induction cooktop can handle everyday meals when your usual pans fit together without crowding the controls. Check the base and rim sizes of the cookware you use for a complete dinner.
If large skillets and stockpots dominate your cooking, compare a wider surface before choosing.
Does a 24-inch induction cooktop need special cookware?
It needs cookware with an induction-compatible magnetic base. Cast iron and some stainless steel pans work, while plain aluminum, copper and glass generally need a compatible base layer.
Check the cookware instructions and use a magnet as an initial screen before deciding which pans to keep or replace.
What should I check before installing a built-in induction cooktop?
Check the required counter opening, countertop thickness, ventilation space, clearances and electrical connection before arranging installation. Overall appliance dimensions do not give you the cutout size.
Have a qualified installer confirm the cabinet fit and an electrician confirm the circuit against the instructions for the exact model.
Can a 24-inch induction cooktop fit above an oven?
It can if both appliances allow that arrangement and their clearance requirements are met. Empava identifies compatibility with its 24- or 30-inch under-counter single wall ovens.
For another oven, verify both manuals, including space for cooling, wiring and the oven enclosure, before planning the countertop opening.